Exactly how silverware rings first came to exist is a mystery. Although many people think that in Medieval Europe poor servants stole away pieces of their masters flatware to make into wedding rings. I’ve also read sailors did the same with silver from their ship. In any case, these rings have been made for centuries. In the 70’s utensil jewelry had a great resurgence, and continues to be popular today.
I found the idea to make rings out of flatware through Pinterest. This overview image of the process, from More Design Please, has been all over that site. Do you ever feel like everyone on Pinterest is pinning ideas, but not trying them? I’ve seen that same image on how to make one of these rings a thousand times, but never another person’s attempt. Anyway, the original tutorial on how to make these rings comes from the blog Through the Front Door, check out that post here. It takes a couple of practice tries to get a nice ring, so don’t use your grandmother’s heirloom silver on your first attempt.
For this project you will need:
Flatware which is either sterling silver or silver plated, stainless steel is not suitable, because it is too hard to bend. From what I have read sterling silver is the easiest to work with, but can be hard to find for cheap. I used silver plated pieces, some of which I found for 10 cents, and others for $1 at various thrift stores. When looking for pieces, remember that the thinner they are, the easier they will be to bend. This is why butter knifes, serving spoons, and the like aren’t used, they’re just too thick.
Metal saw or snips, my husband sawed through the first few spoons for me, but I later used heavy-duty snips to score a line where I wanted the cut, and was able to bend the spoon head so broke off at my line.
Sandpaper or metal file, to polish the cut end. If you accidentally score the silverware during bending, use sandpaper to smooth it out as well.
Butane torch, and butane. I bought the same one that was featured on Through the Front Door. It was $7 at Home Depot, and extra butane was $3. If you have a heavier duty torch, that will work too, just be careful not to melt the silverware!
Ring mandrel, which a metal tool used to shape rings. You can also use a dowel or socket that is close to your ring size as an aid in shaping your silverware.
Rubber mallet, to aid in the shaping of the ring. A regular hammer wrapped in several layers of leather scraps or a thick dishtowel, and secured with a rubber-band will also work.
Pliers, ones without ridges are better since they won’t leave indents on the silverware. I wrapped leather scraps around the ends of the ones I used.
Protective gloves, if you have them use welding gloves, if not, thick work gloves will protect your hands while heating the silverware.
Here are some of the pieces I used, all were silver plated:

I also had another fork in the same pattern as the one on the far right, and two other spoons… all of which are now a tangled mess:
 The procedure I followed that worked well and resulted in a nice shaped ring:
1. Measure the finger you want to wear the ring on, use paper like Through the Front Door did, or string.
2. Use your finger measurement to mark on the utensil where the cut will be.

3. Either saw the top off the utensil or score the mark deeply with snips, then bend the top until it breaks off at the score line.
4. Sand down the raw edge:

5. Hold the tip of the utensil with pliers, and apply heat with the torch. Use gloves, as the pliers are likely to heat up as well. I applied heat for around 20 minutes, since in my past attempts the metal did not become pliable with lesser exposure. If you are using a heavy-duty torch, the time to heat it up will be considerably less.

6. Douse the metal in cool water. I ran cool water from my tap over the metal, still held in the pliers. Here is my spoon after heating and cooling, as you can see the finish has changed colors:

7. Once the metal is completely cool, hold both ends with a set of pliers, and shape. I used a wooden dowel slightly larger than my ring size, so I could adjust down when I had the proper shape. I made my ring overlapping, you can also make it spiral up the finger, as shown on Through the Front Door.
8. Sand down any roughness, or scratches, and polish.

It takes some time to perfect your technique. I tried to bend them without heat at first but they wouldn’t curve nicely, they stayed very angular. I also tried to bend the metal while it was hot. However, the utensils tended to break at their thinnest point. I think because the metal was cooling unevenly, creating stress points. Once you find a system that works for you, it only takes a few dollars and a few minutes to create a lovely piece of silver jewelry, good luck!!


 As you can see on the left the wiring was in terrible shape, and the ugly chain it came with… sucked. I cleaned the wood and wicker by spritzing it with water in my bathtub and using an old toothbrush I got the crevices clean. I hung it up to dry and it was as good as new! It’s important in cleaning wicker that it doesn’t get too wet, and dries quickly! I bought a cheap new light cord set from
 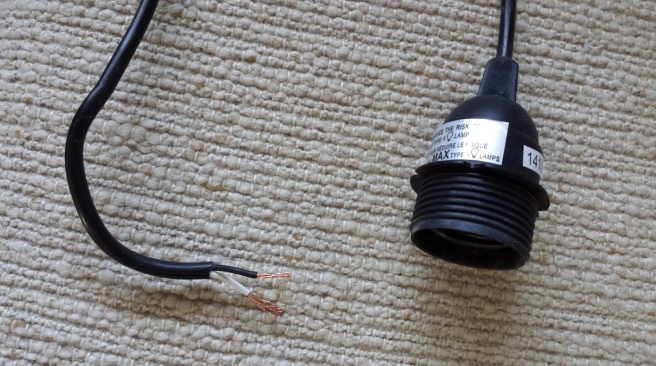 A plain cord going up to the ceiling plate was too unimaginative for me. I googled cool ideas other people have come up with like this